Negative Film Scanning Rig
Sep 20 25 • 7 min read
Part List
- Nikon D5100
- Sigma 70mm f/2.8 EX DG
- Godox LDP8Bi LED Video Light
- 3D Printed 35mm film holder
- 3D Printed mask/stand for film holder
- 3D Printed base stand for backlight
- 3D Printed focus ring extension
- 3D Printed lens hood
I put together this simple DSLR film scanning rig to re-digitize my negatives (some of the shop scans I had were horrid) and to scan my home-developed films. I chose this route because:
- I already had a DSLR lying around
- Decent scanners are expensive or hard to come by where I live
- Second-hand scanners aren’t guaranteed to last
That said, this wasn’t a straightforward path. It required research, careful planning, and some DIY work. In this blog post, I’ll walk through how I did the thing that’s been done many times by other people.

Requirements
The final setup had to meet a few needs:
- Needed to fit 35mm films in the frame nicely. Support for 120mm would have been a huge plus.
- Needed to be easy to assemble, with few moving parts, and sturdy.
- Needed to be much cheaper than dedicated film scanners for all this effort to make sense.
- Did not need motorization or automation. Speed is not a priority since finishing a roll takes weeks or months for me.
The Camera
Everything had to be built around the camera I own: a Nikon D5100. Its 16MP APS-C sensor (not full-frame) is good enough for my needs since I don’t plan on making large prints. The swiveling screen it has is especially useful for making adjustments without bending over the screen.
The rest of the specs are irrelevant here because they are either common in most modern digital cameras, or they don’t matter for scanning.
The biggest limitation worth mentioning is that the APS-C sensor is smaller than full-frame, which introduces some challenges, which is covered in the lens section.
The Lens
I picked up a second-hand Sigma 70mm f/2.8 EX DG (the older non-“Art” version) from a local photography store for around ~150 Euros.
The APS-C crop factor is 1.5x, so this lens behaves like a 105mm on a full-frame (70mm × 1.5). It also supports true 1:1 magnification, meaning a 5cm × 5cm subject projects onto the sensor exactly as 5cm × 5cm.
A 35mm (24mm x 36mm) film frame would create a reflection of the same size on the sensor plane (on the other side of the lens, where the image is focuses) at 1:1 magnification point. Since full-frame digital cameras have the exact same size with 35mm film for their sensors, 1:1 magnification creates an ideal scenario where you can project the film frame perfectly onto the sensor and capture all its details without zooming out. But with an APS-C sensor, the smaller size means that it only covers part of that projected image (roughly 1.5× cropped). To fit the whole frame, we need to move the camera further away from the negative, which sacrifices some detail/density.
In practice, the results are still very usable. But with 120 film (medium format), which ranges from 6×4.5cm to 6×9cm and beyond, you’d have to move even further back. That costs more detail than I’d like. My plan is to experiment with digital stitching instead. I am yet to try this out, and see if it is viable and fun.
Autofocus doesn’t work with the D5100 body, but that’s irrelevant since film scanning requires manual focus anyway. I designed this simple focus ring extension with a long arm, making tiny adjustments much easier.
Overall, the lens is great. It is quite sharp at mid apertures (f/5.6–f/8 looks best to me), good edge performance, and no noticeable distortion or aberrations to my untrained eyes.

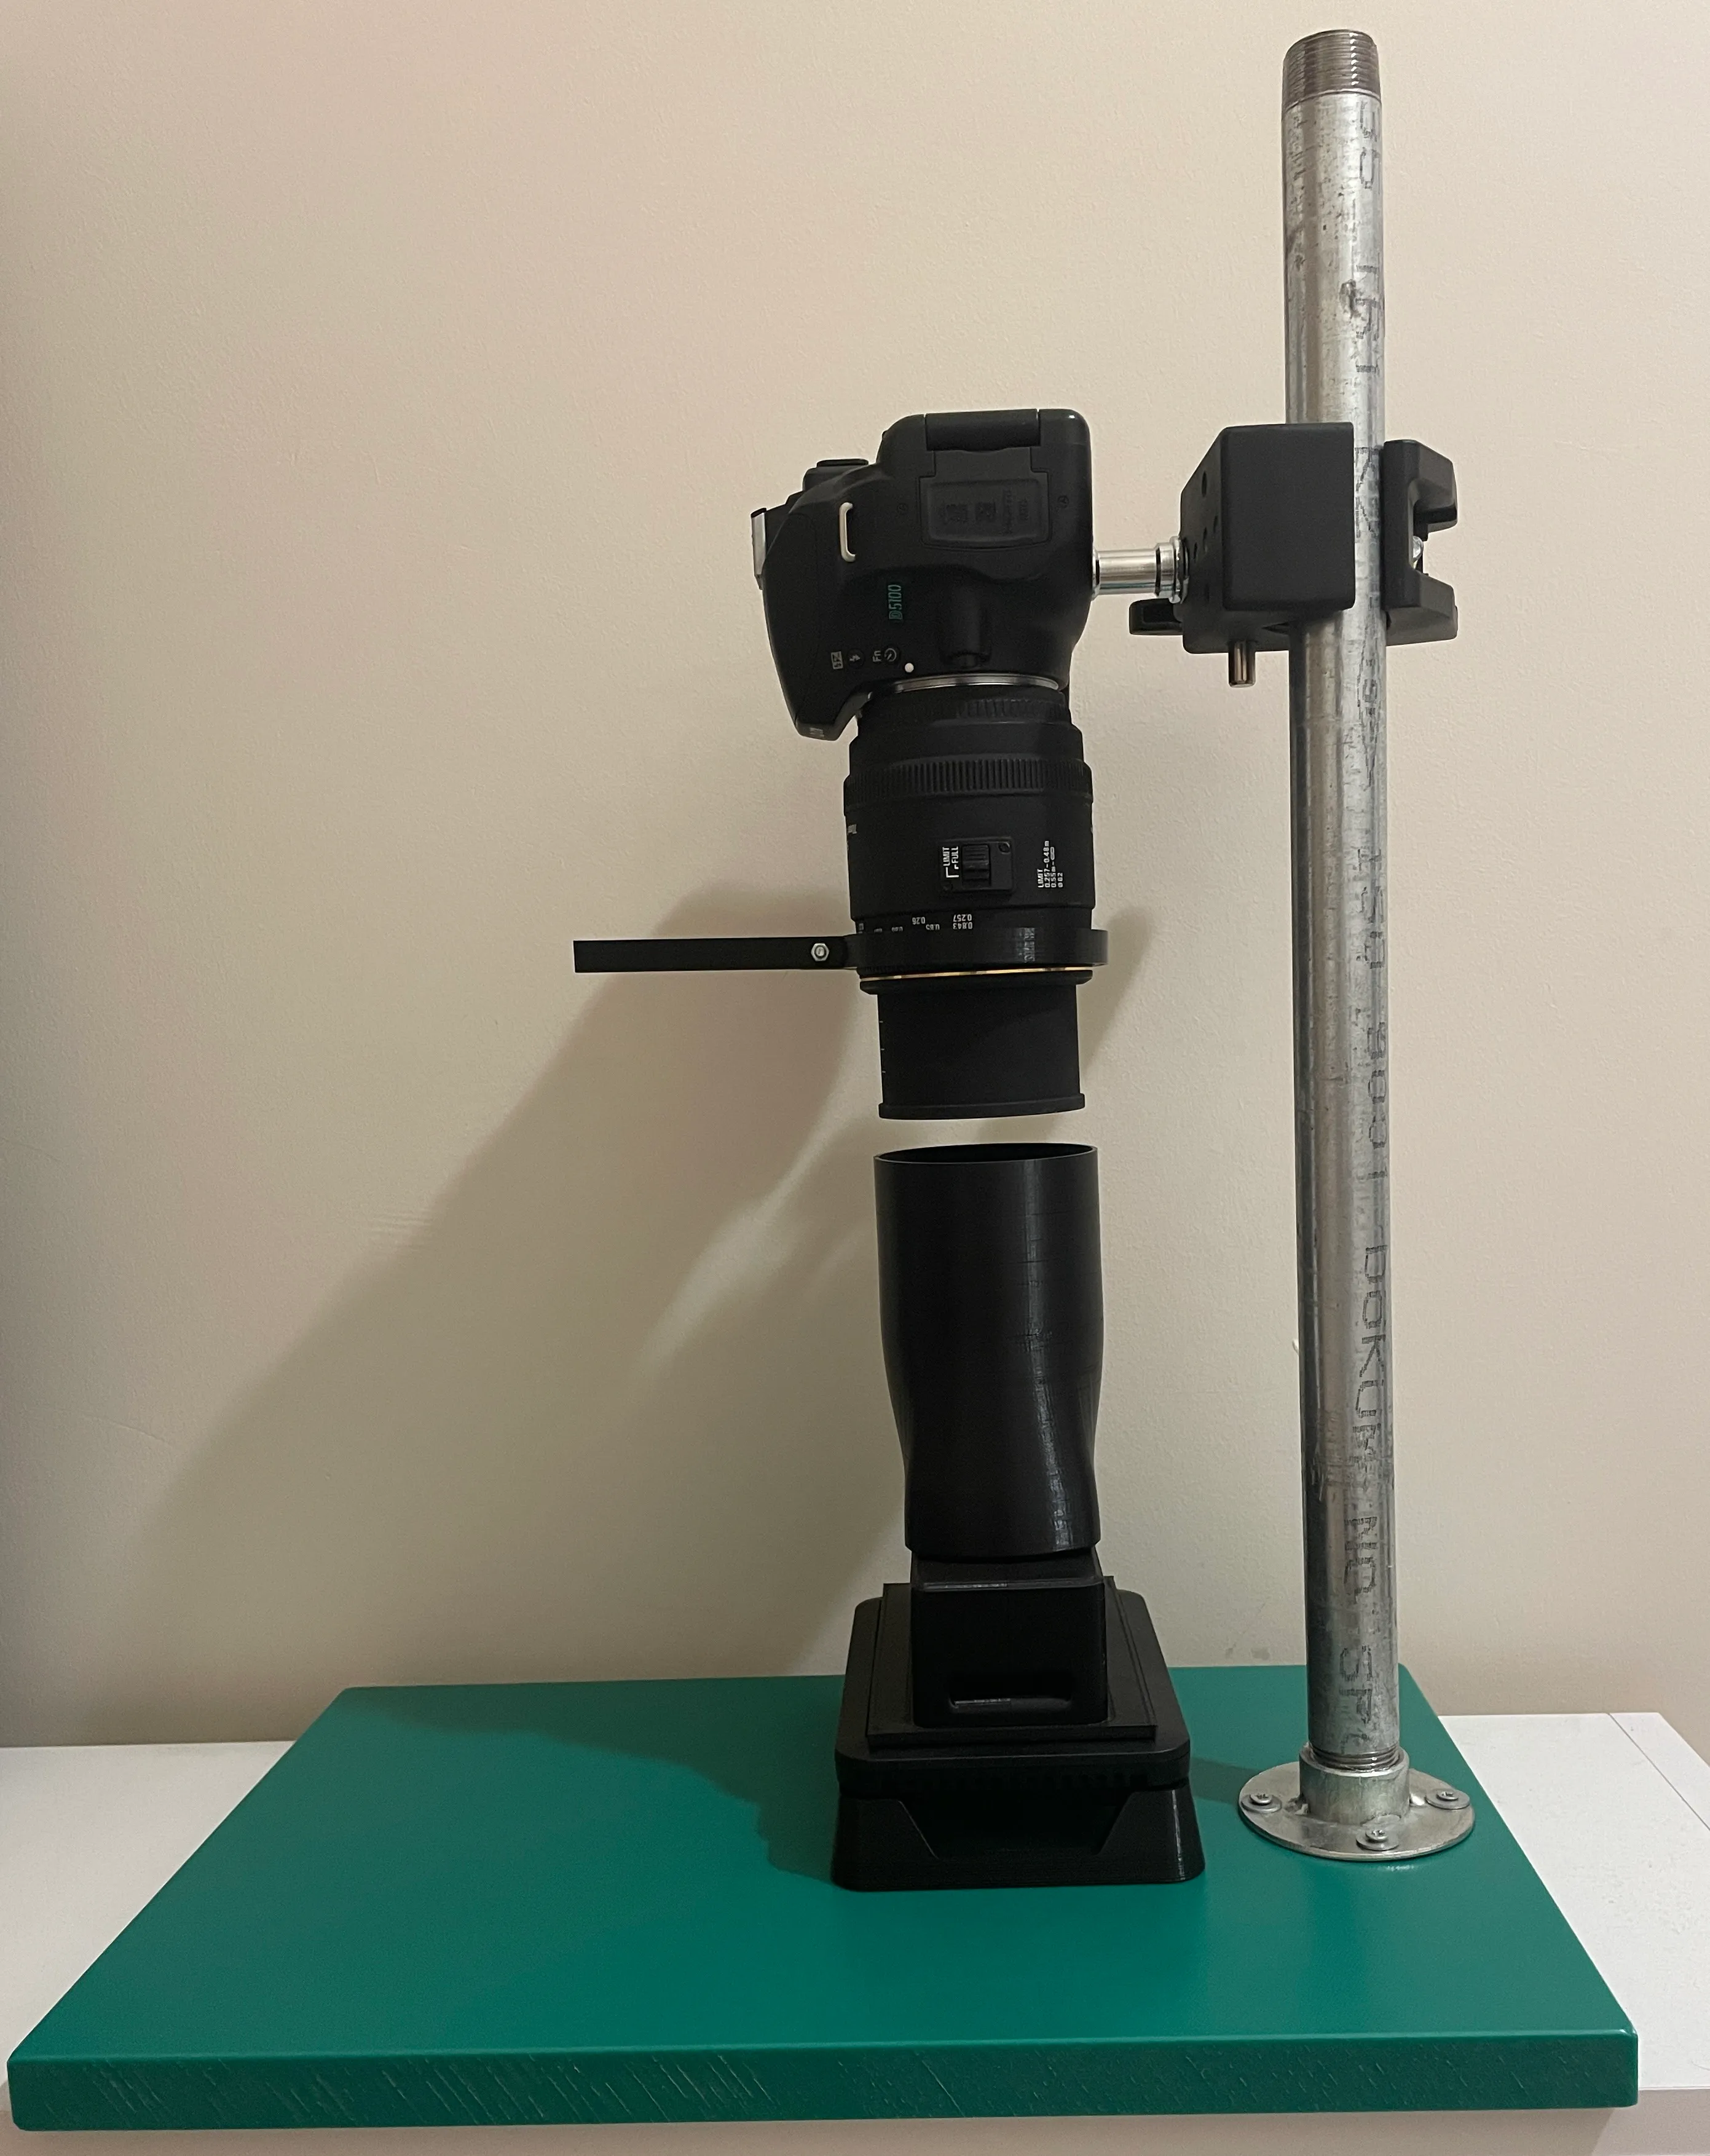
The Copy Stand
There are many approaches for holding the camera steady in scanning setups:
- Copy stands
- Lens mounted contraptions (like Valoi)
- Rail based rigs
- Tripods with inverted columns and camera facing down
I went with a copy stand form factor because it seemed the most versatile for upgrading and adapting different parts. It is compact, stable, and solid. Stability is critical. The sensor and film plane must be perfectly parallel on all axes. Even the slightest tilt can throw parts of the frame out of focus because the depth of field at f/5.6–f/8 is razor thin, probably less than a millimeter.
To keep things stable, I built the stand with a plastic butcher block, a 3/4” threaded metal pipe, and a metal flange. The flange is screwed into the base, and the pipe goes into it. A super clamp attaches the camera to the pipe, making it easy to adjust height. Once tightened, the whole setup is very solid.
Backlight
Light is one of the most important factors in film scanning. Some people get decent results by placing negatives on a tablet or phone screen, provided the panel is good enough. However, this still requires either a diffusion layer or some distance between the film and the screen to avoid visible pixel patterns.
I decided to use a dedicated backlight instead and found the Godox LDP8Bi LED Video Light to be the most affordable option available where I live. It has several advantages:
- Compact, yet large enough for both 35mm and 120mm formats
- Adjustable color temperature (2800K–6500K) for matching a film’s base color or making color corrections
- High color accuracy (CRI >96, TLCI ~98)
- Built-in diffusion layer
- Bright enough for scanning at lower ISO and faster shutter speeds
- USB-C powered

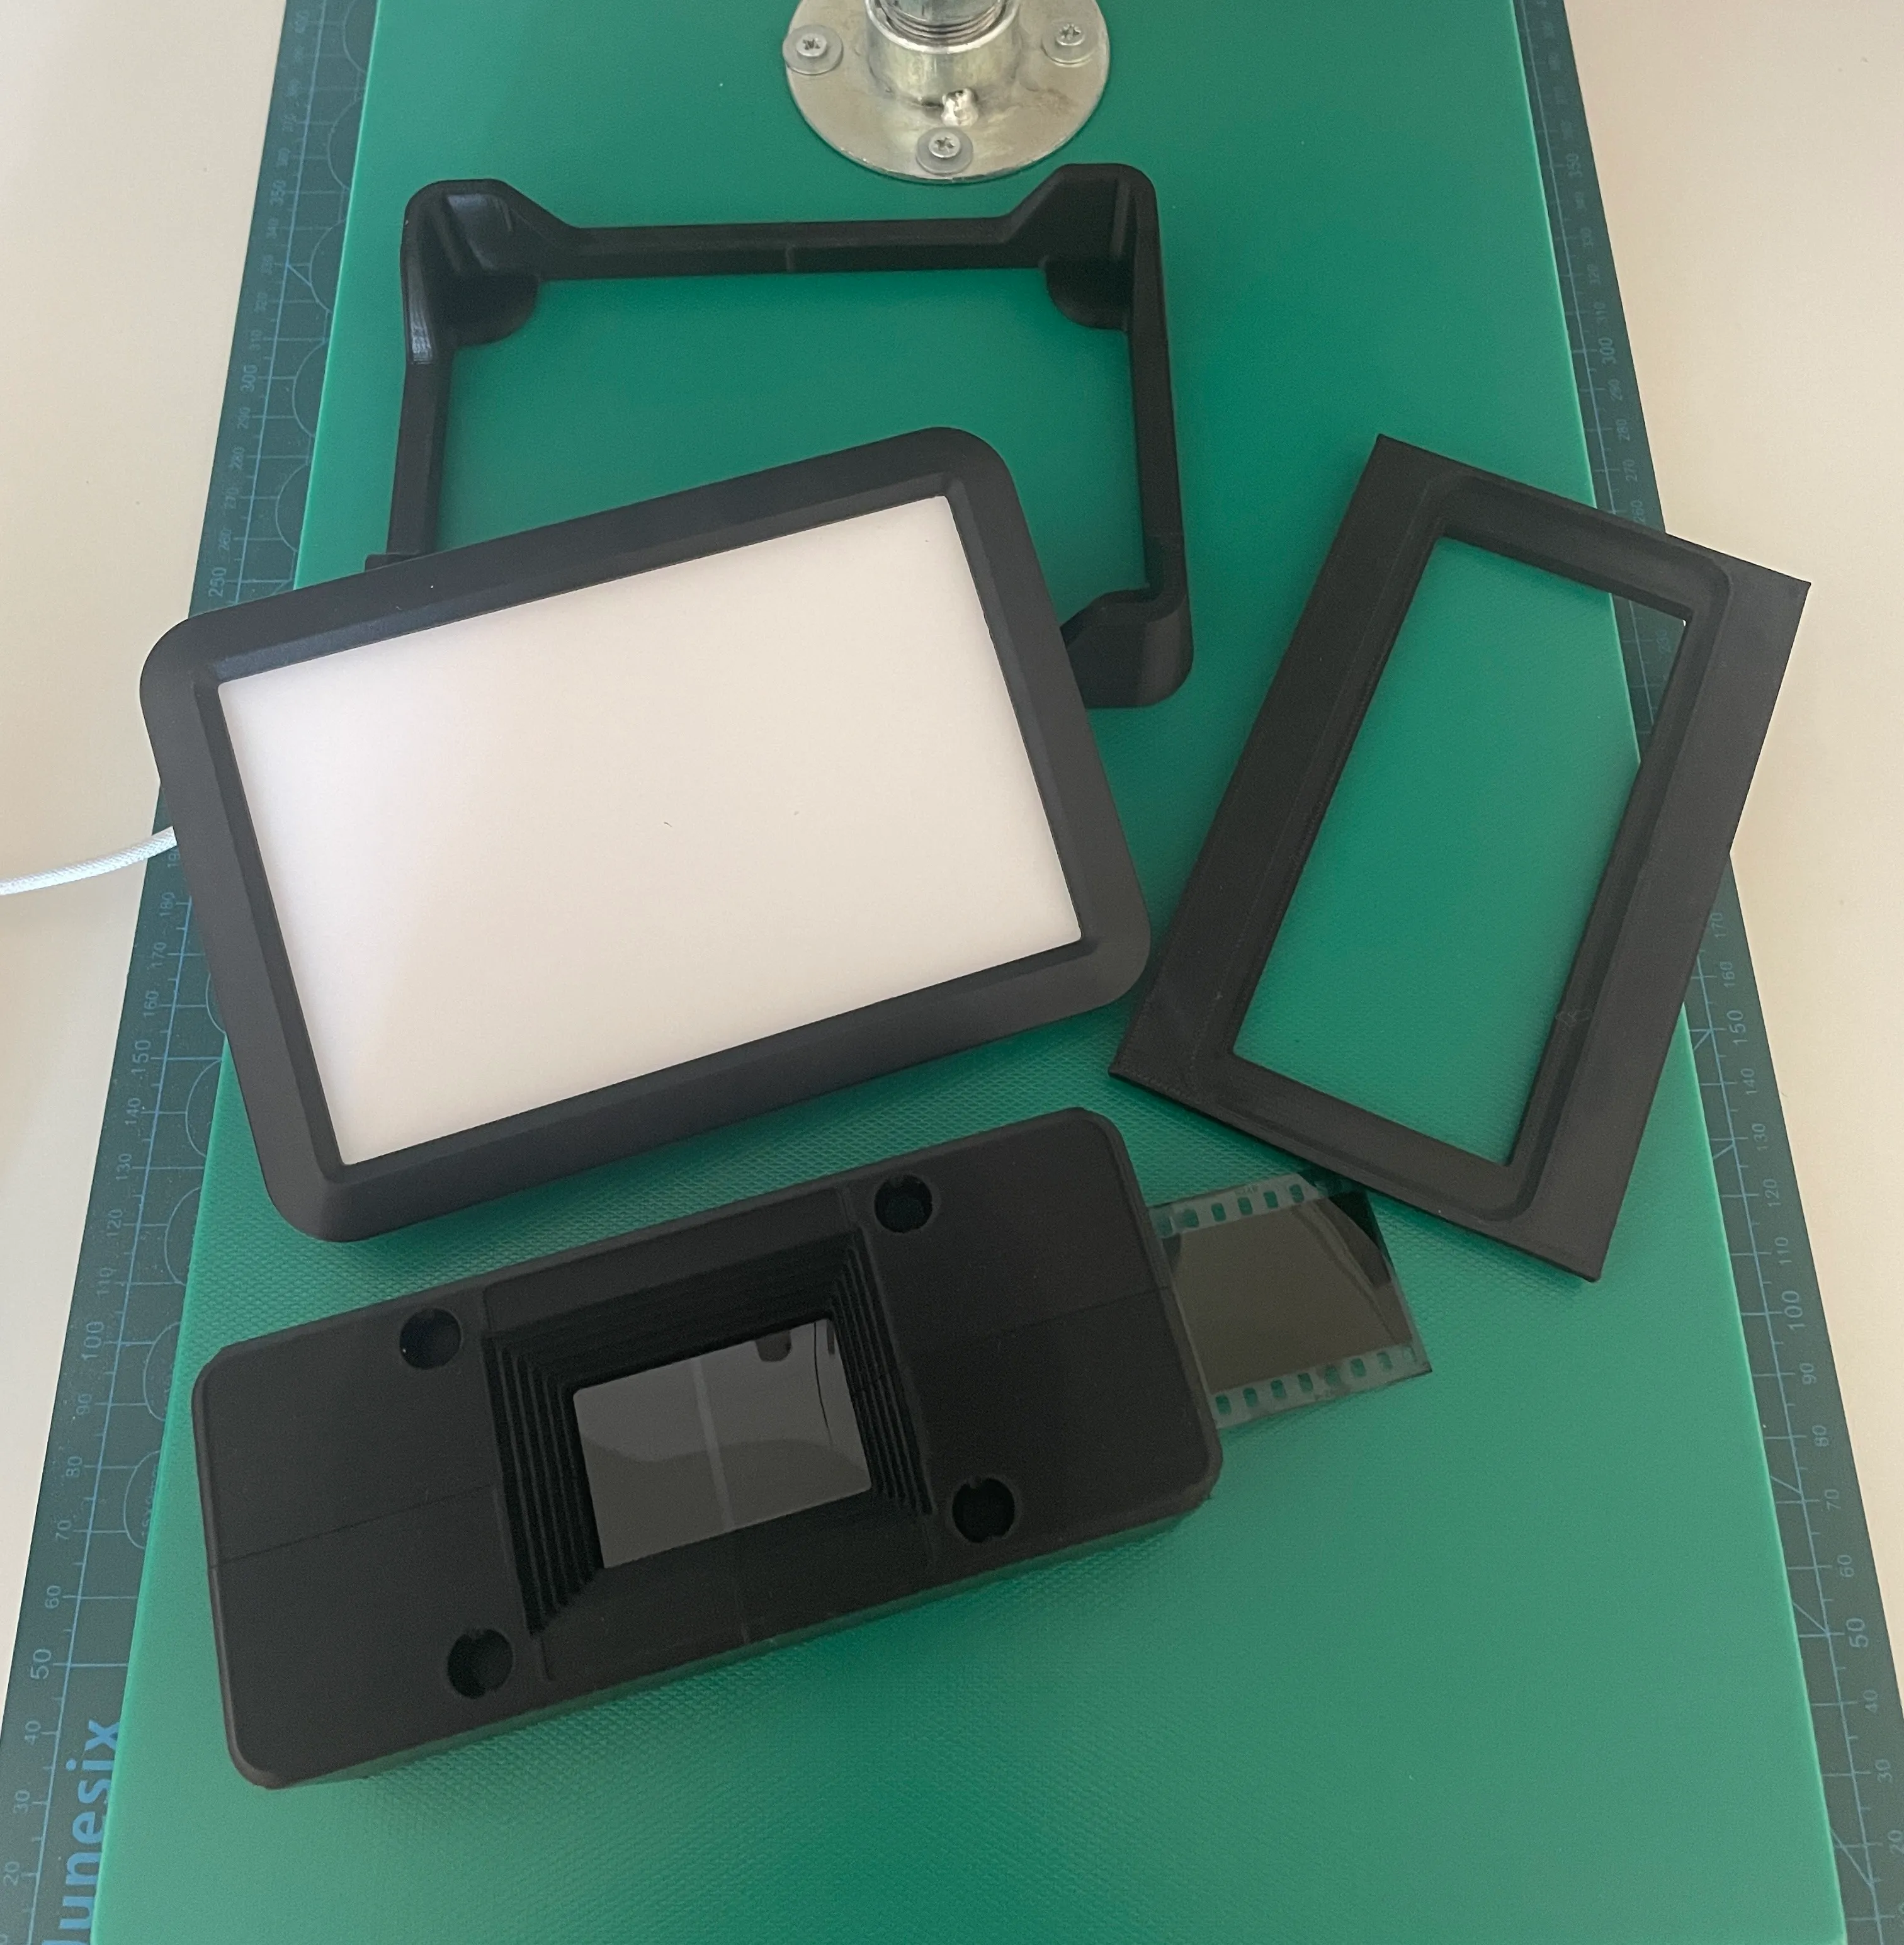
The Film Plane
This is where 3D printing comes in. There are plenty of existing models online for film holders, negative carriers, adapters, and lightboxes. I tried several, and while most worked fine, I ultimately went with what samw427 shared here. It is very easy to reel the negative into this film holder, and it keeps the negative flat.
To adapt it for my setup, I designed a mounting piece for the film holder, placed the backlight on this base, and added a hood on top to prevent lights leaking in from affecting the scans.
All different parts laid out:
All parts fitted together, except the lens hood

And this is how it looks on the viewfinder.

The whole setup turned out pretty fine and usable. I am still working on fine-tuning the scanning process and color grading, but all in all, it was a very fun project.
Part 2 for scanning process is coming soon!
